Industrial_Panel_Labeling_Tips_and_Tricks.pdf
Tips and Tricks: Labeling an Industrial Control Panel
Wire Labeling
- Establish a method and stick to it.
- Good practice to show where the wiring is coming from and where it is going to
- Don't put too much information on the label as it can become confusing and difficult to read
- Size the labels properly and don't heat shrink until testing has been completed.
Hardware Labeling
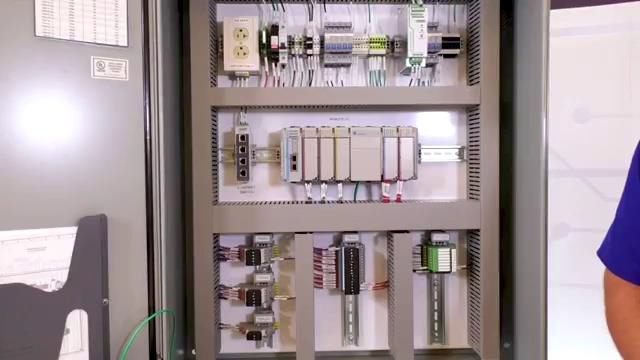
- Clearly label all hardware and make sure it makes sense to end user
- Good practice to make sure all IP addresses are on all radios, PLC's and network equipment
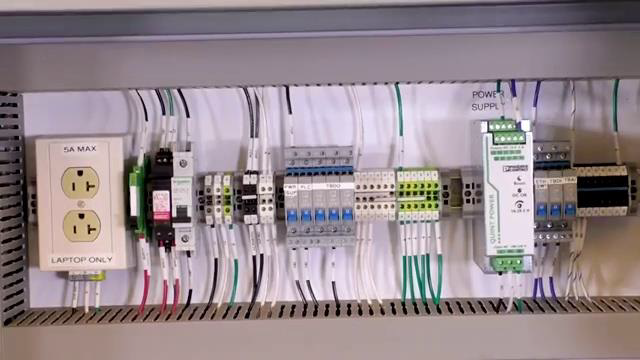
- Make sure to list any voltage or amperage considerations for hardware if necessary
UL Labeling
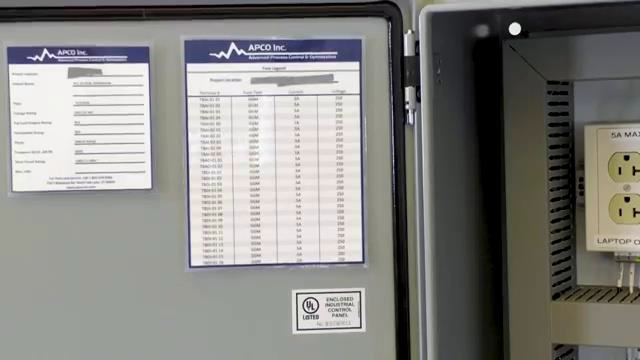
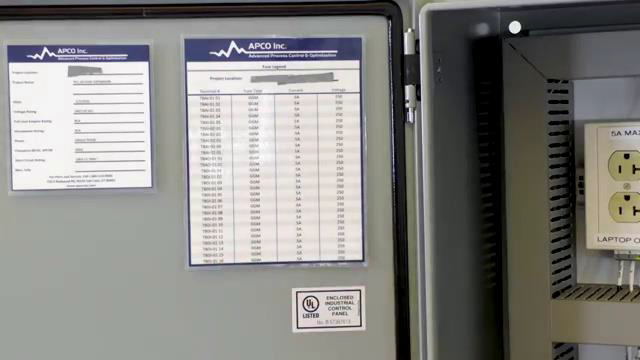
- Must have a main panel ID
- This label should include Input voltage, short circuit rating, FLA and fuse legend
- Wire labels should match the drawing provided
Transcript:
[0m:4s] Hi I'm Josh Bloom, welcome to another video in the RSP Supply education series. In today's video we want to discuss some of the tricks of the trade when it comes to properly labeling the hardware and wiring within an industrial control panel. There is currently no universal standard that is followed when it comes to how to label wires in a panel. However, there are some guidelines that we need to follow if we intend to meet the National electrical code as well as panels that will fall under the UL listed umbrella. The labeling practices I will show you today are not necessarily required but are good guidelines to follow to ensure your panel is labeled properly. Let's first discuss hardware. We want to make sure that the hardware within the panel is clearly labeled. Make sure that it makes sense. We want to think of the end user when labeling hardware. Can they understand it? We also may want to use IP addresses for any radios or the PLC. We also want to make sure that we list any voltage or amperage considerations, specifically like when we're talking about an outlet. We want to make sure that we're not plugging in heavy power tools when that outlet is intended for something like a laptop.

[1m:15s] Now let's talk about wire labeling. It is very important that we establish a clear method when labeling wires within the panel.

[1m:24s] This would mean we want to make sure that we know where the wires are going to and where they're coming from. We also want to make sure that we use the same naming convention when labeling wires within our panel. For instance, when we're labeling AC wires, we want to make sure that they all have a very similar naming convention. The same goes for DC wires or any of our signal wires. We want to make sure that it makes sense and the naming convention we use is similar for all of these types of labels. It is also important to consider the label orientation. Now this may seem like a small detail, but when we are labeling wires, we want to make sure that the wire labels are all facing in the same direction. When you have labels that are facing different directions throughout the entire panel, it can become confusing for operators who might be working in the panel.
[2m:14s] By making sure that the label orientation is the same, it makes it much easier for those operators to read. We also want to make sure that the labels that we put on our wires inside our panel don't have too much information.
[2m:27s] When a label has too much information, often the text becomes too small and difficult for the operator to read or can become confusing. We also want to make sure that we size the label properly for the size of wire that we're using.
[2m:42s] As you can see here, the labels that we have on these wires are a snug fit.
[2m:47s] You may also notice that these labels are not currently heat shrunk. That is because we want to make sure that before we do any heat shrinking on our labeling, testing has been done on that panel. This allows us to go back and change any labels if we need to before they are sent out into the field for the client to use.
[3m:8s] Now that we have discussed wire and hardware labeling, let's talk about how we might label our cabinet if we intend to list the panel with UL. One of the main things you will see different from a non UL panel to a UL panel is the main panel ID label which you can see here.

[3m:25s] This particular label provides us input voltage so that operators working within that panel know what kind of voltage they're dealing with. It also provides full load amperage and a short circuit rating.
[3m:39s] One other thing that you will notice on this particular label is that we have a fuse legend. This particular label shows us where every single fuse in this panel is located and it also identifies the type of fuse or what that fuse is rated for for this particular panel in every single location you might find a fuse.

[4m:0s] Another thing to consider when we are wanting to list our panel with UL in regards to labeling is that all the labels in our panel need to make sure that they match the drawing that we provide with the panel exactly. This is a very stringent requirement of UL. This is also good practice even if there is no plan to list the panel. As I mentioned before, there are many different labeling methods that can be used. These are just a few tips that you can implement to make the labeling in your industrial control panel, more clean and practical.
[4m:32s] For a full line of industrial control panel hardware and thousands of other products, please go to our website. For more information or other educational videos, go to RSPSupply.com, the Internet's top source for industrial hardware. Also, don't forget: like and subscribe.


