
WEATHERFLO Enclosure Accessories
WEATHERFLO enclosure accessories are designed to enhance airflow, cooling performance, and installation flexibility for nVent Hoffman WEATHERFLO outdoor enclosures. These accessories support reliable thermal management in outdoor and industrial environments where heat buildup, weather exposure, and debris ingress can impact equipment performance and longevity.
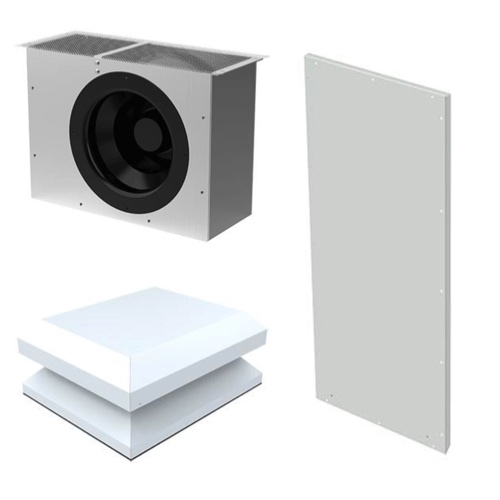
This category includes WEATHERFLO impeller packages, pagoda tops, rear covers, and enclosure panels. WEATHERFLO impellers provide additional airflow for outdoor enclosures and are supplied as complete kits with a high-performance, shielded 115 VAC 60 Hz impeller and an aluminum housing. These impellers are commonly used to improve ventilation and help manage internal temperatures in heat-generating applications.
WEATHERFLO pagoda tops are designed for use with impeller packages and include aluminum dampers and stainless steel mesh to help prevent debris, insects, and contaminants from entering the enclosure while allowing airflow. Solid tops are available for applications using closed-loop cooling solutions.
FAQs
Q: What are WEATHERFLO enclosure accessories used for?
WEATHERFLO accessories are used to improve airflow, cooling, and mounting flexibility in outdoor electrical enclosures.
Q: What is included in a WEATHERFLO impeller package?
Each impeller package includes a high-performance, shielded 115 VAC 60 Hz impeller and an aluminum housing designed to increase enclosure airflow.
Q: What is the purpose of a WEATHERFLO pagoda top?
Pagoda tops are used with impeller packages to allow airflow while preventing debris ingress. They include aluminum dampers and stainless steel mesh for environmental protection.
Q: When are WEATHERFLO HD rear covers used?
HD rear covers are used when equipment such as drives is mounted directly to the rear cover of the enclosure rather than to an internal mounting panel.
Q: Are solid tops available for WEATHERFLO enclosures?
Yes. Solid tops are designed for use with closed-loop cooling solutions where external airflow is not required.
Why Buy WEATHERFLO Enclosure Accessories from RSP Supply
RSP Supply offers a complete selection of WEATHERFLO enclosure accessories to support effective thermal management and reliable outdoor enclosure performance. Our product range helps maintain equipment protection, airflow control, and installation flexibility in demanding industrial and environmental applications.