CONCEPT Enclosure Accessories

RSP Supply offers a broad selection of nVent Hoffman CONCEPT enclosure accessories designed to support flexible layout, improved accessibility, and efficient component mounting in machine control applications. These accessories are compatible with CONCEPT enclosures, which are available in single-door and two-door configurations, including landscape, flush-mount, and sloped-top designs. CONCEPT enclosures are commonly used in industrial automation environments where organized internal layouts and easy access are essential.
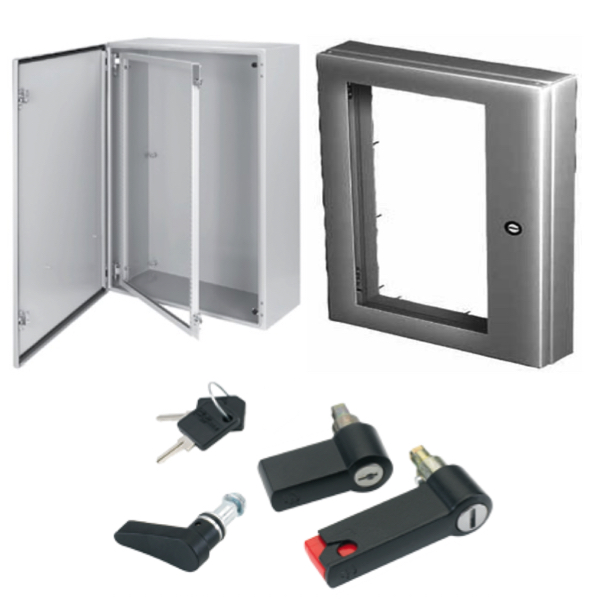
Available CONCEPT accessories include backplates, swing-out panels, doors, panel depth adjustment components, window kits, and framework for DIN rail mounting. Swing-out panels and rack frames provide convenient access to internal equipment by allowing mounted components to pivot outward from the enclosure. Swing-out panels offer up to 106 degrees of access for CSP panels and up to 94 degrees for CSPB panels, while swing-out rack frames provide up to 120 degrees of access for 19-inch rack-mounted equipment.
Additional accessories such as deep-hinged window kits and enclosure handles enhance usability and functionality. CONCEPT deep-hinged window kits feature a die-cast aluminum frame with a clear polycarbonate window and a 2-inch offset that accommodates lights, switches, meters, and other front-mounted devices. Handle options include non-locking handles, key-lock handles, and padlocking handles to meet varying access and security requirements. Together, these accessories support efficient installation, maintenance, and long-term operation of CONCEPT enclosure systems.
FAQs
Q: What are CONCEPT enclosure accessories used for?
CONCEPT enclosure accessories are used to mount, organize, and provide access to internal components within CONCEPT wall-mount and HMI enclosures.
Q: What types of enclosures are CONCEPT accessories compatible with?
They are compatible with nVent Hoffman CONCEPT enclosures, including single-door, two-door, landscape, flush-mount, sloped-top, and HMI enclosure designs.
Q: What is the benefit of swing-out panels and rack frames?
Swing-out panels and rack frames allow internal equipment to pivot outward, providing easier access for installation, wiring, and maintenance.
Q: What features do CONCEPT deep-hinged window kits offer?
These window kits include a die-cast aluminum frame, a clear polycarbonate window, and a 2-inch depth that allows front-mounted components to be installed behind the window.
Q: Are locking options available for CONCEPT enclosure handles?
Yes, handle options include non-locking handles, zinc die-cast key lock handles, and padlocking handles that accept padlocks with up to a 5/16-inch locking bar.
Why Buy CONCEPT Enclosure Accessories from RSP Supply
RSP Supply provides a reliable source for nVent Hoffman CONCEPT enclosure accessories designed for industrial machine control applications. Our selection supports flexible configuration, improved accessibility, and durable installation of control components. Customers rely on RSP Supply for accurate product information and enclosure accessories engineered to meet the demands of industrial automation environments.

